

UPD 02 Aug 2024 No matter how small or absent is your experience in design, UI/UX, and coding, you still are capable of doing a decent MVP or working prototype of your idea. Yes, even without a technical co-founder, you can give your product a good start!
So as I promised, here is a short overview of tools to start creating a prototype or an MVP of the app with your own hands.
- 1. Outline customer journey – create basic frames and user stories with Xmind
- 2. Decide how the user interface should look like – prepare mockups and screens
- 3. Put life into your app – use Google Sheets and Google Forms to fill it with realistic dummy data
- 4. Make the prototype work – connect everything with Zapier
- Elevate Your MVP with a Captivating Presentation
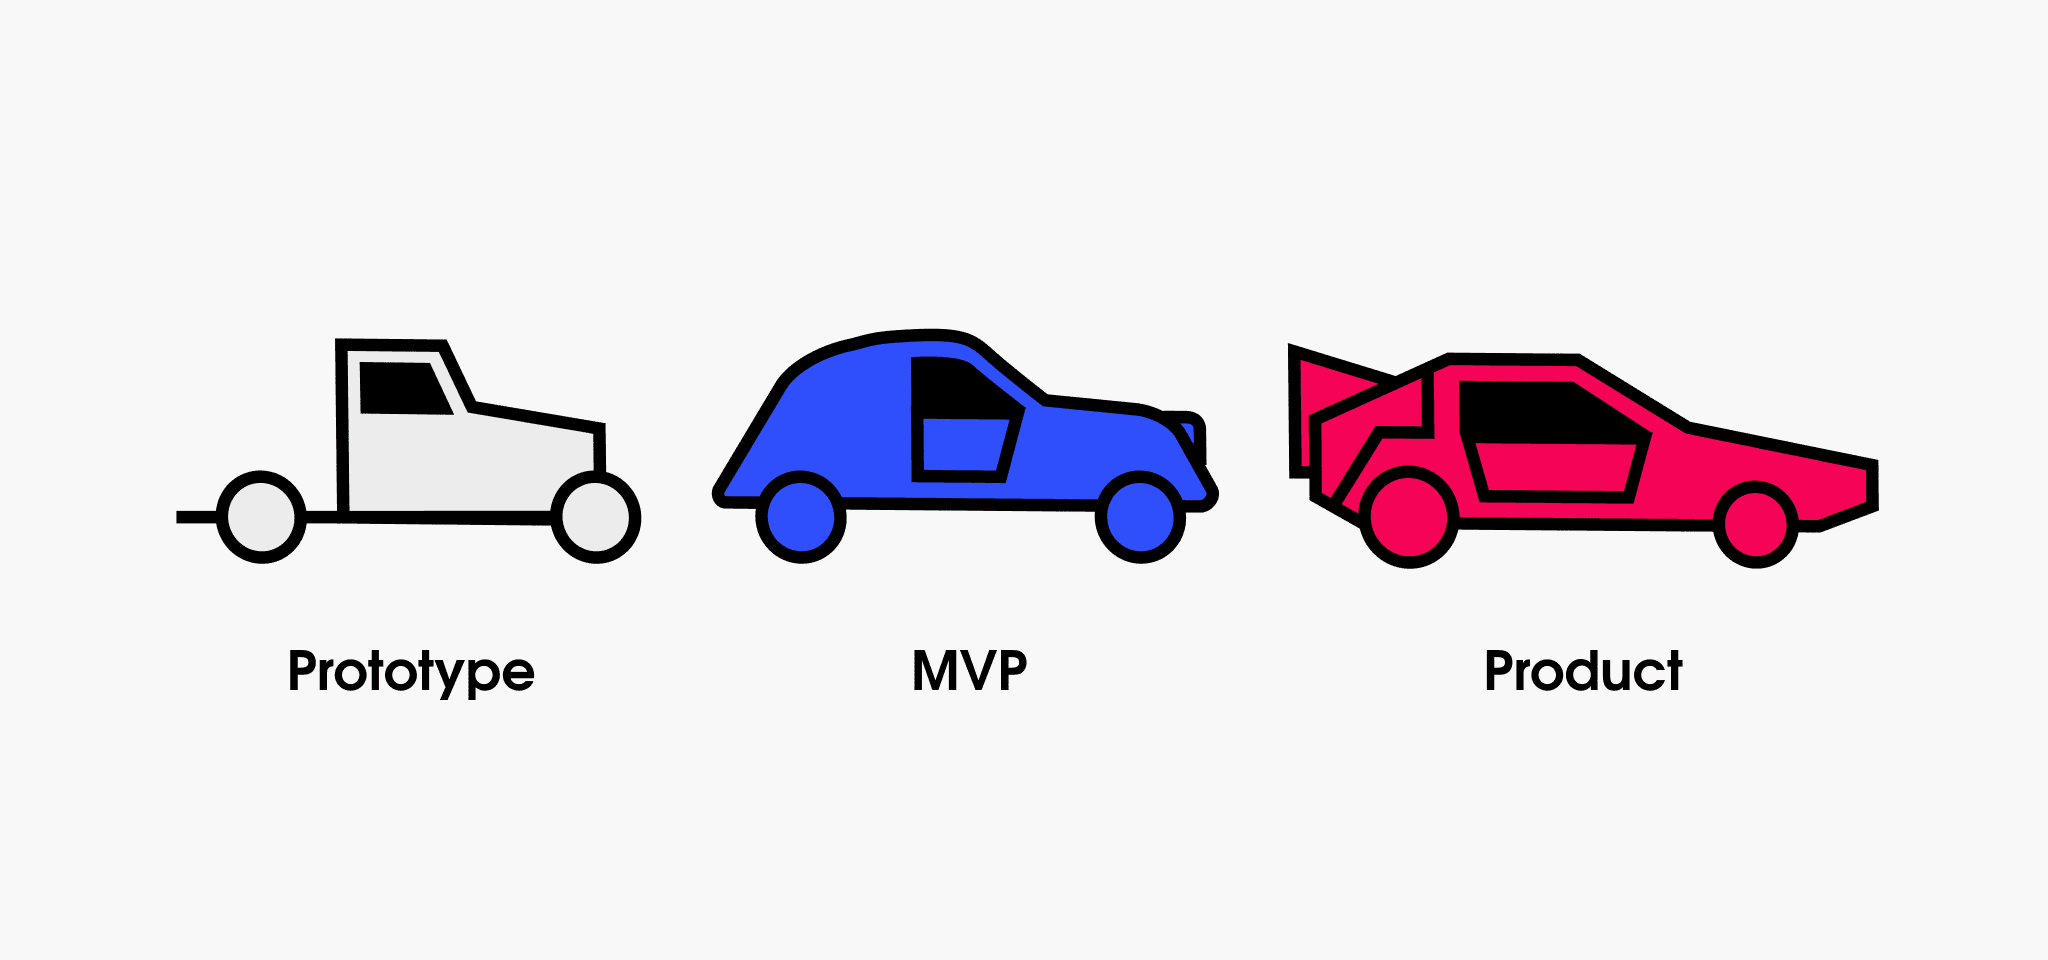
Before you start, look for some tips in our short guides to developing an MVP and story-mapping. Let’s refresh a little bit about what we expect from an MVP to be:
- Simple
- Clear
- Free or minimum costs
- Workable enough to show the value
- No bells and whistles
Schematically saying, you need to go through these steps:
1. Outline customer journey – create basic frames and user stories with Xmind
Xmind remains a top choice for creating basic frames and user stories. It’s the most popular mind-mapping tool on the planet, being open-sourced, great for brainstorming, and easy to collaborate with. It’s also very intuitive, friendly, and available for free.
Tip: saving maps as Evernote notes is a great way to share them.
To get more inspired, check our recent article about story mapping.
2. Decide how the user interface should look like – prepare mockups and screens
With modern tools, your first MVP sketch can look sleek, even if it’s built in a few days. Our number one choice remains Sketch.
Prepare Mockups and Screens for Your MVP in Sketch
Sketch allows you to see your designs come to life with interactive hotspots, dynamic components, and animations before development has begun. Despite its many features, the UI is relatively easy to use, so the learning curve is quite short.
Tip: Try using their Artboards to turn static screens into interactive prototypes, test them with the Sketch Mirror app, and share them on Sketch Cloud.
Three alternative tools worth mentioning are:
- Figma – for collaborative interface design
- Webflow – for website mockups
- Adobe XD – for both designing and prototyping
Figma for Collaborative Design - Figma has grown immensely popular for its collaborative features, making it ideal for teams working remotely.
Webflow for Website Mockups - Webflow is more complex than most DIY website tools, but it’s very efficient for learning HTML and CSS basics.
Adobe XD for Prototyping - Adobe XD has a great iPhone app that lets you preview how an application would look on the device.
For visuals and graphics editing, consider using Canva.
Canva for Visuals Canva has become a go-to for non-designers to create stunning visuals easily. Its drag-and-drop interface and extensive library of templates make it a perfect tool for MVP visuals.
3. Put life into your app – use Google Sheets and Google Forms to fill it with realistic dummy data
Build dummy data with Google Sheets
If you have never used Google Drive – start. Google Sheets has a fantastic range of functions that, when combined, can be useful as an MVP (minimum viable product). Using them as a database is also the quickest database setup you can think of.
Tip: Use the Random Generator add-on for Google Sheets to create test data. Google Forms remains the easiest way to collect information, with the native embedding function into a website being a major plus.
Google Forms is the easiest way to collect information and keep it handy to a read-edit-manipulate spreadsheet. Without even mentioning the native embedding function of a Google Form into a website.
Typeform for Data Collection
Typeform is an alternative tool with dozens of pre-built templates and examples.
Typeform with pre-build templates and examples
By the way, even after you go live, a professional setup database (like SQL or JSON) is still not always needed. In the early stages, when you have only dozens of hits per day, it usually isn’t worth the time of setting up a database from scratch, the effort of maintaining PHP code, or the cost of using a third-party tool. That’s where Google Forms again can help.
4. Make the prototype work – connect everything with Zapier
Zapier is a great automation tool, it can be utilized along with 1500+ apps, and if used smartly, can substitute a backend for you.
I was inspired by this guy’s experience in building a seamless online experience with almost no code. Look what they used and get inspired too:
- Slack for team chat
- Calendly for appointment scheduling
- Stripe to process payments
- Google Forms for customer feedback collection
- Google Sheets for a backup leads database
No-Code Tools to Consider:
- Airtable for database management
- Integromat for complex workflows
- Notion for all-in-one workspace needs
Elevate Your MVP with a Captivating Presentation
In addition, I wanted to stress a paramount step – a presentation or a pitch. So here is another quick tip: get an account on Animaker.com and make a small fun animated presentation for your idea.
Again, no experience with animating is needed, Animaker is pretty easy to use. It also has a voiceover recording feature with the ability to download .mp3 files. Even if you decide that animation is not for you, use this one to put into your slides.
Depending on the nature of your product, you could also add specific WordPress plugins, Shopify, not to mention website building platforms, logo makers, etc. It’s just fascinating how many things you can do on your own using modern technologies. You are welcome to share those you like the most in the comments.
When the blueprint of your MVP is ready, use it to present your idea to potential investors (next time I plan to share some tips from my experience about getting the funding), to hire a CTO or an agency, to inspire peers, and to engage partners.
Your MVP will change as many times as you iterate, and on different stages, you will use different tools. The goal is to iron out the majority of creases before the user even experiences the app or website. Moreover, it is also fun to watch your idea live. Isn’t it?
Conclusion
Your MVP will change as many times as you iterate, and at different stages, you will use different tools. The goal is to iron out the majority of creases before the user even experiences the app or website. Moreover, it is also fun to watch your idea come to life. Isn’t it? To help you on this journey, we’ve considered how to build an MVP without code using five amazing tools tailored for any mvp startup. At Moqod, we know everything about building MVPs. Check out our portfolio page to see our successful projects and how we've helped other startups turn their ideas into reality.


